Creamy Milk Snow Cookies
Indulge in the sweet world of Creamy Milk Snow Cookies, a delightful treat that combines the richness of sweetened condensed milk with the simplicity of a classic cookie recipe.

These homemade snowball cookies are perfect for any occasion, offering a melt-in-your-mouth texture that’s sure to impress. With easy holiday baking in mind, this recipe is a great addition to your Christmas dessert recipes collection.
Key Takeaways
- Simple recipe using sweetened condensed milk
- Melt-in-your-mouth texture
- Perfect for holiday baking and Christmas desserts
- Easy to make and customize
- Great for gifting or serving at parties
The Sweet Appeal of Snow Cookies
Snow cookies, with their melt-in-your-mouth goodness, are a treat for all ages. These delightful cookies are not just a pleasure to eat but also a joy to make, especially with the snow cookies recipe that’s both simple and fun.
A Melt-in-Your-Mouth Experience
The magic of snow cookies lies in their texture. Made with sweetened condensed milk, they offer a rich, velvety smoothness that simply melts in your mouth. This easy snow cookies recipe is a hit during the holiday season, providing a comforting treat that’s hard to resist.
| Cookie Type | Texture | Taste |
|---|---|---|
| Snow Cookies | Melt-in-your-mouth | Sweet, Rich |
| Traditional Cookies | Crunchy/Chewy | Varies |
Perfect for Winter Celebrations
Snow cookies are more than just a tasty treat; they’re a perfect fit for winter treats and festive baking ideas. Their simplicity makes them an excellent choice for holiday baking, allowing you to create a batch with minimal fuss. Whether you’re hosting a party or looking for a simple cookie recipe to enjoy with your family, snow cookies are sure to delight.
Condensed Milk Snow Cookies: Ingredients Overview
The foundation of delicious Condensed Milk Snow Cookies lies in the quality of their ingredients. To create these delightful treats, it’s crucial to understand the role of each component, from the star ingredient, sweetened condensed milk, to the dry ingredients and optional add-ins.
The Magic of Sweetened Condensed Milk
Sweetened condensed milk is the backbone of these cookies, providing a rich, creamy flavor and tender texture. This ingredient is made by evaporating milk to remove a significant portion of its water content, then adding sugar to create a thick, sweet liquid. Using high-quality sweetened condensed milk is essential for achieving the best flavor.
Some bakers prefer to use a specific brand or type of sweetened condensed milk for its unique characteristics. Experimenting with different varieties can help you find the perfect match for your taste preferences.
Essential Dry Ingredients
In addition to sweetened condensed milk, the dry ingredients play a vital role in the cookie’s structure and flavor. These typically include all-purpose flour, baking powder, and salt. The type of flour used can affect the cookie’s texture, with some bakers opting for a combination of all-purpose and cake flour for a tender crumb.
Key dry ingredients include:
- All-purpose flour
- Baking powder
- Salt
Optional Add-ins for Extra Flavor
To customize your Condensed Milk Snow Cookies, consider adding extracts, flavorings, nuts, or mix-ins. These additions can enhance the cookie’s taste and texture, making them even more delightful.
Extracts and Flavorings
Popular extracts and flavorings for snow cookies include vanilla, almond, and lemon. A few drops of your chosen extract can significantly impact the cookie’s flavor profile.
Nuts and Mix-ins
Nuts like pecans or walnuts add a delightful crunch, while mix-ins such as chocolate chips or dried cranberries introduce new flavors and textures. Feel free to experiment with different combinations to find your favorite.

Step-by-Step Baking Instructions
The process of making snow cookies with condensed milk is straightforward and enjoyable, making it a great activity for bakers of all levels. To ensure your baking experience is both fun and successful, follow these step-by-step instructions.
Preparing Your Kitchen and Equipment
Before you start, make sure your kitchen is equipped with the necessary tools. You’ll need a mixing bowl, measuring cups, and a baking sheet lined with parchment paper. Preheating your oven to the right temperature is also crucial for achieving the perfect bake.
Mixing the Perfect Cookie Dough
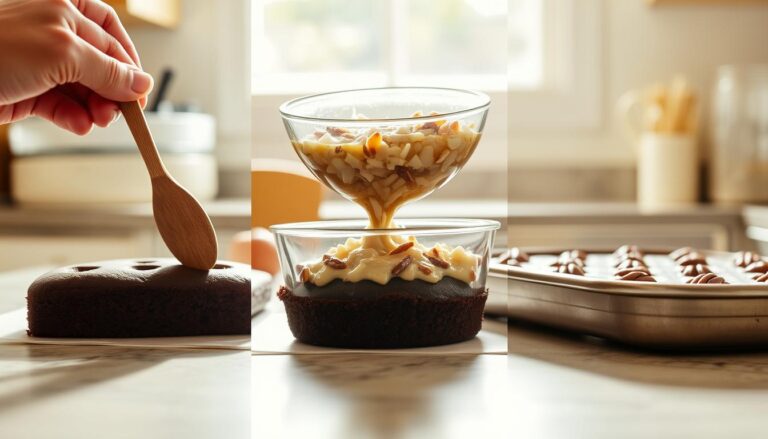
To mix the dough, start by combining the dry ingredients in one bowl and the wet ingredients in another. Then, gradually mix them together until you achieve a smooth consistency.
Achieving the Right Consistency
The dough should be neither too sticky nor too dry. If it’s too sticky, add a bit more flour. If it’s too dry, a small amount of condensed milk can help.
Troubleshooting Common Dough Issues
If your dough crumbles, it might be too dry. On the other hand, if it’s too wet, it could be due to overmixing or too much condensed milk. Adjust accordingly to achieve the perfect consistency.

Baking to Perfection
Scoop the dough into balls and place them on the prepared baking sheet. Leave enough space between each cookie to allow for spreading.
Temperature and Timing Tips
Bake at 350°F (175°C) for about 12-15 minutes. Keep an eye on them; the baking time may vary depending on your oven.
How to Know When They’re Done
The cookies are done when they’re lightly golden around the edges. Let them cool on the baking sheet for a few minutes before transferring them to a wire rack to cool completely.
By following these easy cookie recipe steps, you’ll have a batch of delicious snow cookies perfect for the holiday season or a cookie exchange. Enjoy your baking experience and the delightful treats that come with it!
Decorating Your Snow Cookies
Decorating snow cookies is a fun and creative process that adds a personal touch to your baked goods. It’s an opportunity to let your imagination shine and make your treats truly special for the holiday season.
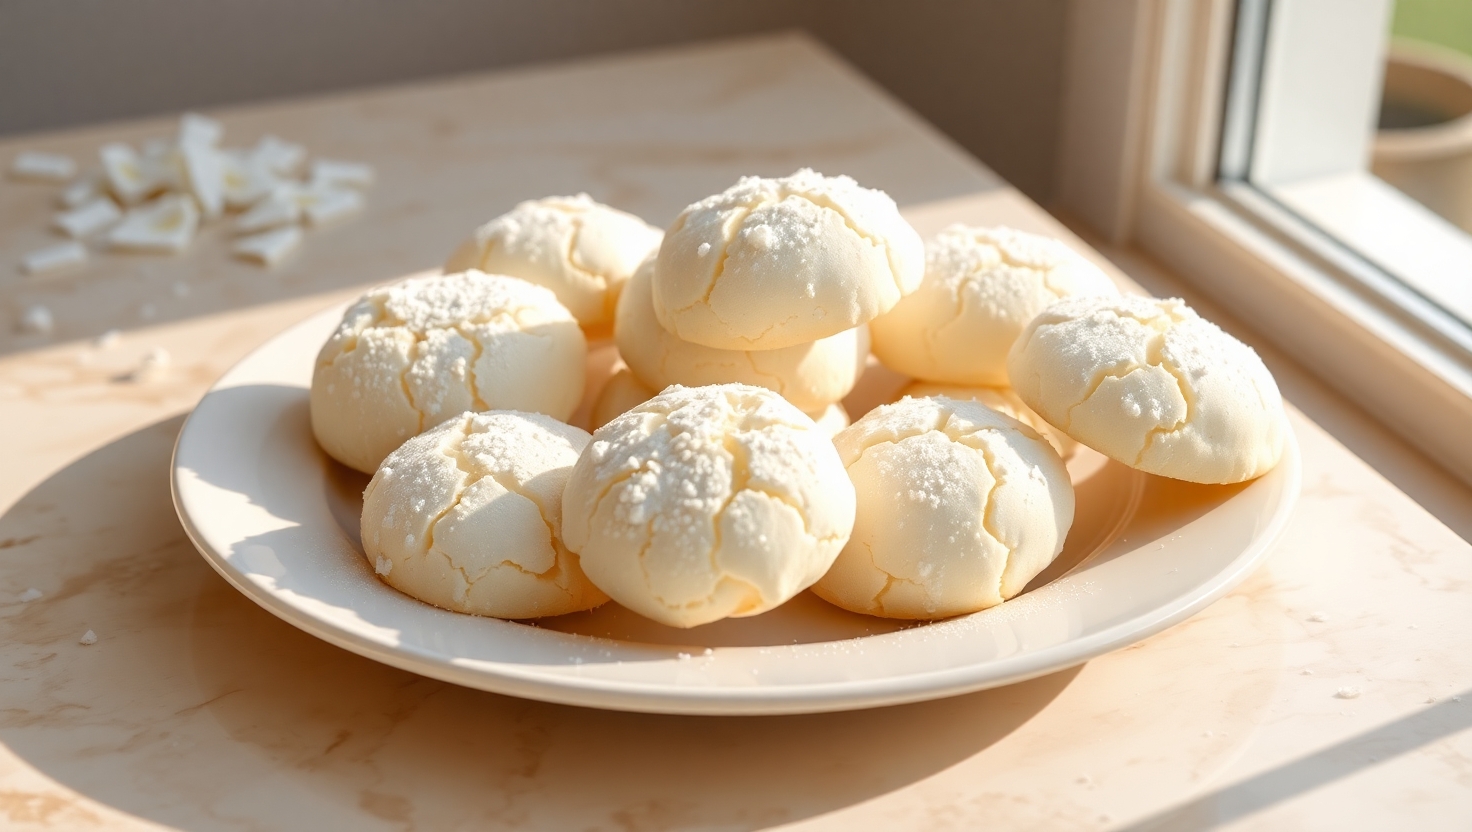
Classic Powdered Sugar Coating Techniques
A classic way to decorate snow cookies is by using a powdered sugar coating. This simple yet elegant technique involves dusting your cookies with powdered sugar to give them a snow-like appearance. You can also mix the powdered sugar with a bit of milk or cream to create a glaze that adds a sweet and smooth finish to your cookies.
Festive Decoration Ideas
For a more festive look, consider using holiday-themed decorations such as red and green sprinkles, edible glitter, or colored icing. You can also use cookie stamps or molds to create intricate designs on your snow cookies. These festive decoration ideas can make your cookies stand out and add to the holiday cheer.

Creating Gift-Worthy Presentations
To make your snow cookies gift-worthy, consider packaging them in decorative tins, jars, or bags. You can also add a personal touch by including a handwritten note or a gift tag with your cookies. Here are some ideas for packaging and presenting your snow cookies:
Packaging Ideas
- Use decorative cellophane bags and tie them with festive ribbons.
- Package cookies in airtight containers to keep them fresh.
- Add a decorative label or tag to your packaging.
Cookie Exchange Tips
Participating in a cookie exchange is a great way to share your snow cookies with friends and family while also enjoying a variety of other holiday treats. Here are some tips for a successful cookie exchange:
| Tip | Description |
|---|---|
| Bake in bulk | Make sure to bake enough cookies for the exchange. |
| Package attractively | Use decorative packaging to make your cookies stand out. |
| Be prepared to share recipes | Some participants may ask for your recipe, so be prepared to share. |
Creative Variations and Serving Suggestions
Elevate your snow cookie game with these creative variations and serving suggestions. Whether you’re looking to mix things up or present your cookies in a new light, we’ve got you covered.
Chocolate-Dipped Snow Cookie Delights
Give your snow cookies a luxurious twist by dipping them in melted chocolate. This adds a rich, velvety texture that complements the tender cookie perfectly. Choose from milk, dark, or white chocolate to suit your taste.

Nutty and Fruity Alternatives
Experiment with different flavors by incorporating nuts or dried fruits into your snow cookie dough. Almonds, walnuts, or pecans add a delightful crunch, while cranberries or cherries introduce a fruity twist.
Pairing Suggestions
Pair your snow cookies with a warm beverage for a cozy treat. Coffee, tea, or hot chocolate are excellent choices. You can also serve them alongside a scoop of ice cream for a delightful dessert.
Storage and Make-Ahead Tips
To keep your snow cookies fresh, store them in an airtight container. You can also make them ahead of time and freeze for later use.
Freezing Instructions
Place the cookies in a single layer on a baking sheet and freeze until solid. Then, transfer them to a freezer-safe bag or container.
Maintaining Freshness
To maintain freshness, keep the cookies away from direct sunlight and moisture. They can be stored at room temperature for up to a week.
| Storage Method | Duration | Tips |
|---|---|---|
| Room Temperature | Up to 1 week | Keep in airtight container |
| Freezer | Up to 3 months | Freeze in single layer, then transfer to freezer-safe bag |
Conclusion: Enjoying Your Homemade Snow Cookies
Now that you’ve baked your delicious Snow Cookies, it’s time to indulge in the sweet treats and share them with loved ones. Enjoying homemade cookies is a true delight, and the joy of cookie love is amplified during the holiday season.
Savor the melt-in-your-mouth experience of your Snow Cookies, and relish the happiness they bring to those around you. Whether you’re enjoying them with a warm cup of milk or sharing them as holiday treats, your homemade cookies are sure to spread cheer.
As you enjoy your Snow Cookies, remember the love and care that went into making them. Share your creations with friends and family, and be prepared for the delight and appreciation you’ll receive in return. Happy baking, and enjoy your sweet treats!
FAQ
What is the main ingredient in Condensed Milk Snow Cookies?
The main ingredient in Condensed Milk Snow Cookies is sweetened condensed milk, which gives the cookies their rich, creamy flavor and melt-in-your-mouth texture.
Can I customize the recipe with different flavorings or add-ins?
Yes, you can customize the recipe by adding different extracts, such as vanilla or almond, or incorporating nuts, chocolate chips, or dried fruit to give the cookies a unique twist.
How do I achieve the right consistency for the cookie dough?
To achieve the right consistency, make sure to mix the dough until it’s just combined, and avoid overmixing. If the dough is too sticky, you can add a small amount of flour. If it’s too dry, you can add a little more condensed milk.
Can I make Snow Cookies ahead of time and store them?
Yes, you can make Snow Cookies ahead of time and store them in an airtight container at room temperature for up to 5 days. You can also freeze them for up to 2 months.
How do I decorate Snow Cookies for a festive look?
You can decorate Snow Cookies by dusting them with powdered sugar, dipping them in melted chocolate, or using festive sprinkles and edible decorations to give them a holiday look.
Can I use other types of milk or cream instead of sweetened condensed milk?
Sweetened condensed milk is a key ingredient in Snow Cookies, and substituting it with other types of milk or cream may alter the flavor and texture. However, you can experiment with different types of condensed milk, such as coconut condensed milk, for a unique flavor.
Are Snow Cookies suitable for cookie exchanges or gift-giving?
Yes, Snow Cookies are perfect for cookie exchanges or gift-giving. You can package them in decorative tins or jars, or wrap them in cellophane bags with festive ribbons, making them a thoughtful and delicious gift.